X-Code Simulator
Xcode Simulator is a powerful tool available on macOS that allows developers to test iOS, iPadOS, watchOS, tvOS, and visionOS applications without physical devices, but it can sometimes be helpful for web development and debugging. This document provides instructions on how to leverage Xcode Simulator for web development, testing, and debugging.
Advantages of using X-Code simulator in Web Development
In web development, we often encounter issues that are specific to iOS. Given that iPhones and other Apple devices hold a significant share of the user market, it becomes essential to ensure that our code works seamlessly within the Apple ecosystem. In such cases, the Xcode Simulator can be an extremely powerful tool.
While alternatives like BrowserStack are available, they can sometimes fall short—particularly in areas such as JavaScript debugging and real-time CSS/HTML inspection. The Xcode Simulator, on the other hand, provides a more reliable and integrated environment for testing and debugging iOS-specific behavior.
System Requirements
- macOS: macOS 10.15 (Catalina) or later (recommended: macOS 14.0 or later)
- Xcode: Xcode 12.0 or later (download from Mac App Store)
- Disk Space:
- Minimum 10GB free space for basic iOS simulators
- Additional space required for multiple simulator runtimes (each iOS version ~6-8GB)
- watchOS, tvOS, and visionOS simulators require additional space
Installation
- Install Xcode from the Mac App Store
- Launch Xcode and accept the license agreement
- Install additional components when prompted (Command Line Tools, Simulator runtimes)
Using Simulators
Starting A Simulator
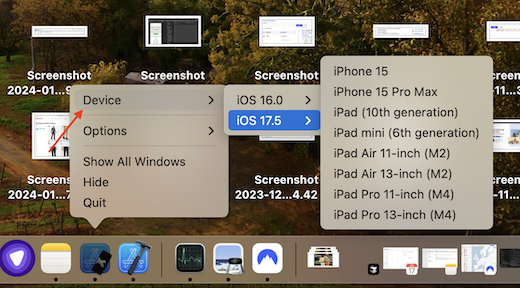
- Add X-Code Simulator on your Dock, and there it will provide you option to use any of the devices and runtimes installed locally
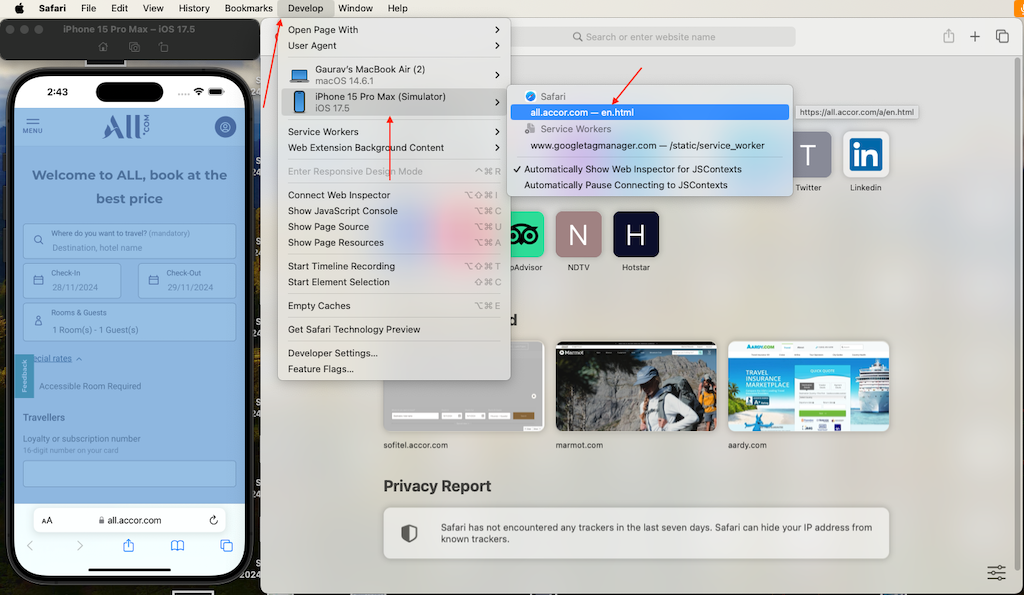
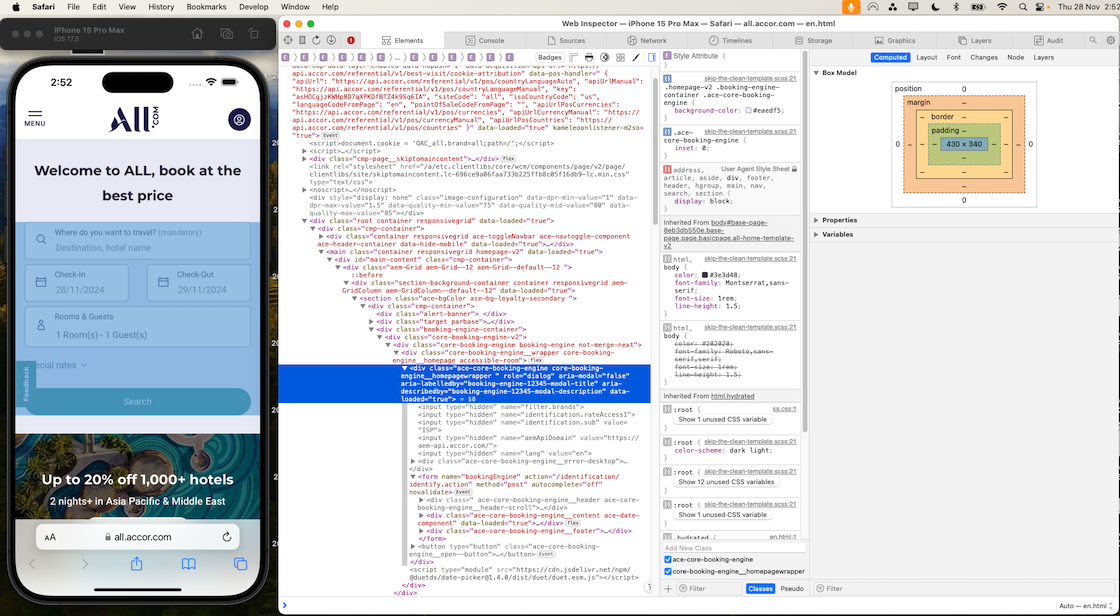
Using Safari Web Inspector for debugging your webpage:
- Launch Safari on your Mac
- Open the webpage you want to test in your simulated device browser
- Go to the Develop menu in Safari
- It should show you the currently opened simulated device and iOS version
Managing Simulators
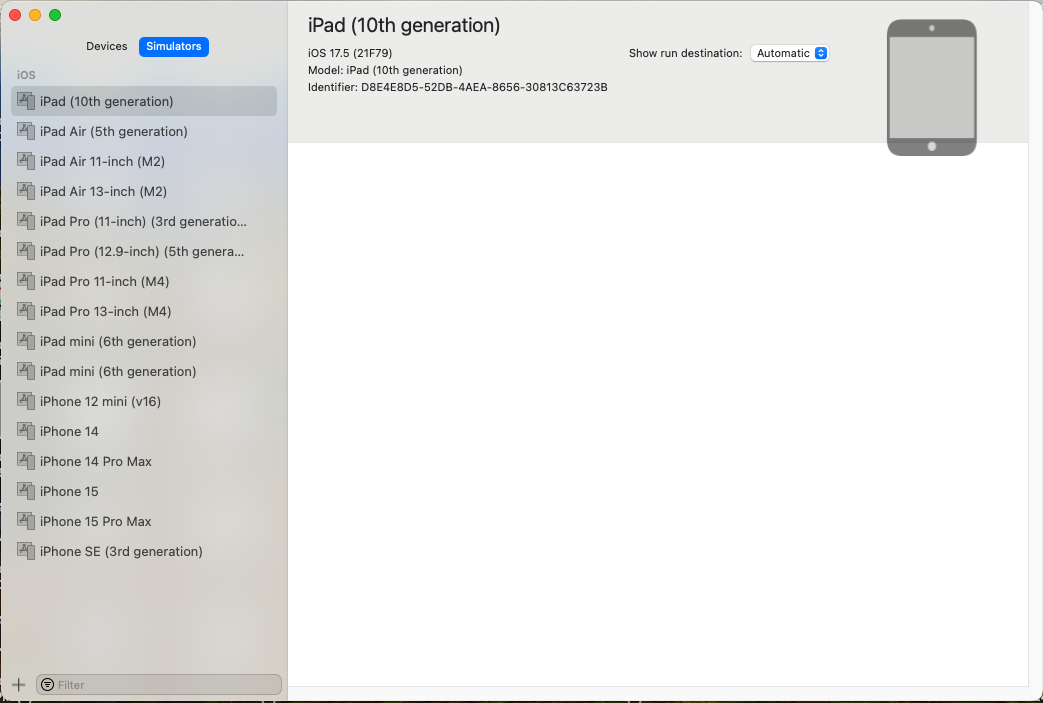
Viewing Available Simulators:
- Open X-Code
- From Menu bar Navigate to Window → Devices and Simulators window (
⇧ ⌘ 2) - Click on the Simulators tab
- Browse the list of available simulators organized by device type (iPad, iPhone, etc.)
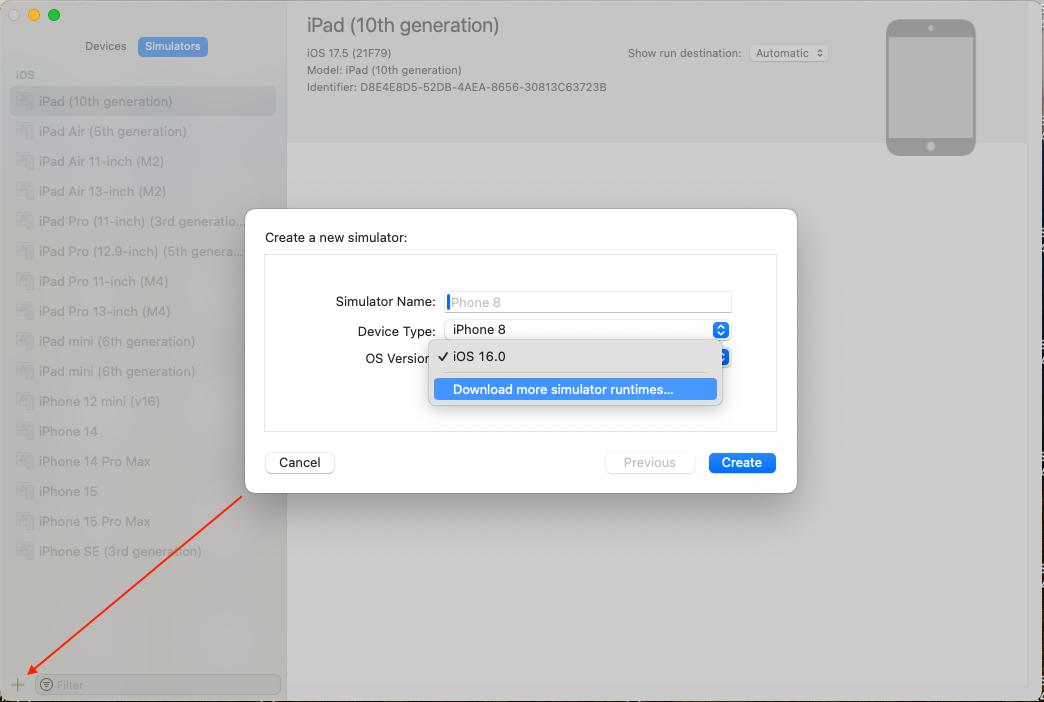
Creating a New Simulator:
- In the Devices and Simulators window, click the + button at the bottom left
- Fill in the simulator details:
- Simulator Name: Enter a descriptive name (e.g., “iPhone 15 Pro Max - iOS 17.5”)
- Device Type: Select from dropdown (iPhone 8, iPhone 15, iPad, etc.)
- OS Version: Choose the iOS version
- If the version isn’t installed, click “Download more simulator runtimes…“
- Click Create
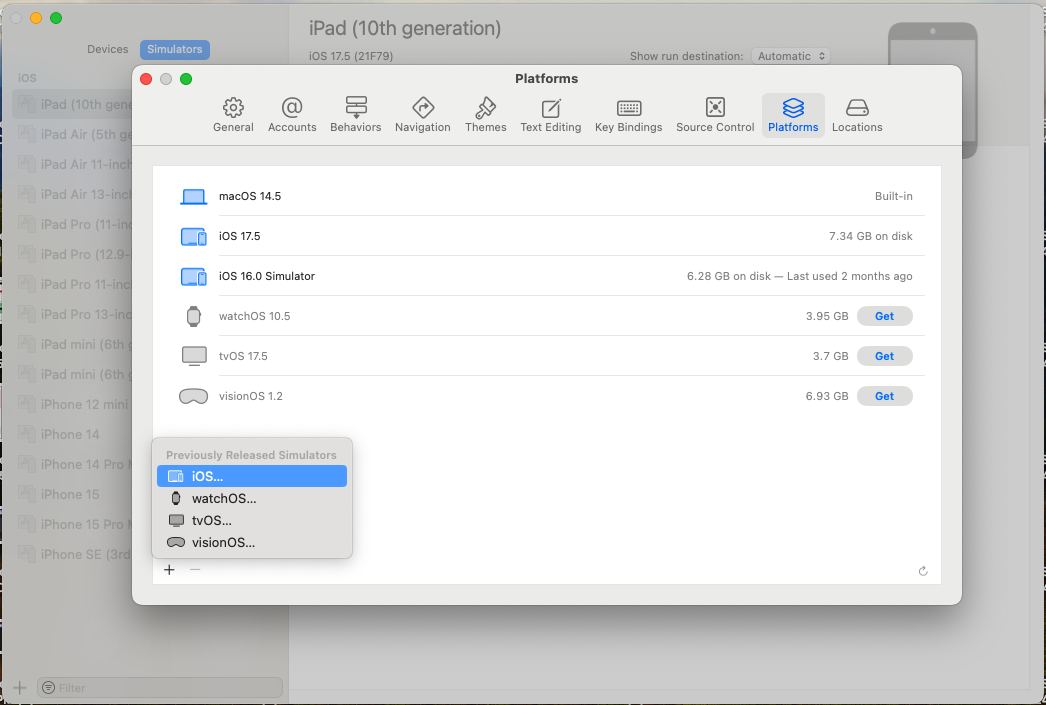
Managing Platforms and Runtimes:
- In Xcode, go to Settings (or Preferences in older versions)
- Navigate to the Platforms/Components tab
- View installed platforms and their disk usage:
- macOS: Built-in
- iOS: Shows disk usage (e.g., “7.34 GB on disk”)
- watchOS, tvOS, visionOS: Available for download with “Get” button
- Click “Previously Released Simulators” to access older iOS versions
- Use + and - buttons to add or remove simulators.